New Player Guide
Welcome! This game originally released as Ferentus, as a beta MMORPG, almost 20 years ago, then re-released as Herrcot, and again as Xiones, before shutting down entirely in 2010?. A few years ago, a small team of dedicated players committed countless hours of their time reviving the old game client, setting up an emulation server, and brought us what is now FHX Restoration!
This guide will introduce you to the world they brought back to life and that so many of us have called home. We hope you enjoy it as much as we have!
Join us on Discord for any questions or assistance you might need!
Info:
Getting started
Account
| 1 | Go to fhxrestoration.com. | |
| 2 | Click Register. | 
|
| 3 | Enter your account info. | 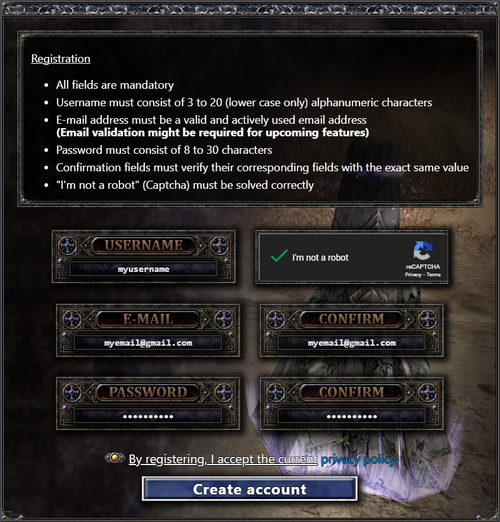
|
| 4 | Click Create account. | |
| 4 | Check your email and click Verify Email Address. | 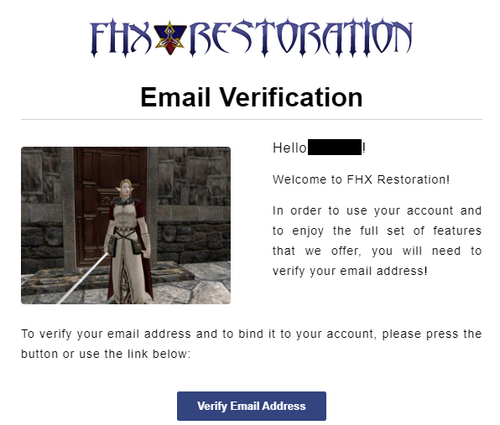
|
|
Info:
| ||
This account is for the game client; login on the FHX website is currently disabled.
Download
| 1 | Go to fhxrestoration.com/downloads. | |
| 2 | Click Download. | 
|
| 3 | Make sure to Keep the download. | 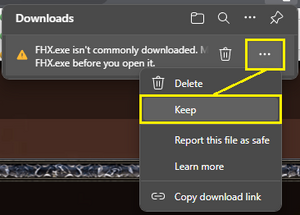 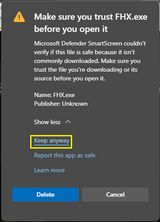
|
| 4 | Open your Downloads folder and run FHX.exe | |
| 5 | If prompted, click More info and Run anyway | 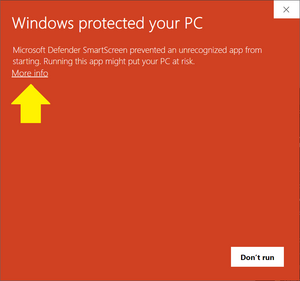 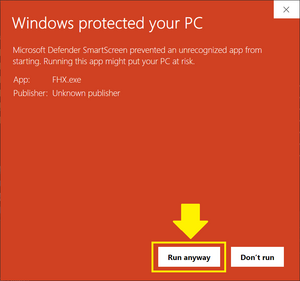
|
Creating your character
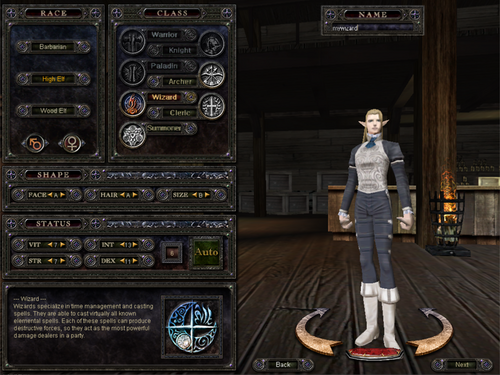
Once you have signed in to the server, you will be taken to the character select screen. Here is where you decide your character's name, race, class, and starting attributes. You can have a maximum of 5 characters per account.
The available classes are determined by the selected race. For an overview, visit Races and Classes.
The starting attribute points can be allocated yourself or simply click Auto to assign them based on the class selected.
Once you're ready, create your first character and join us in the world of Idios. You will spawn in the starting city, the Imperial Castle of Rog, with 2 skill points (K) and some beginner equipment in your inventory (I).
Movement
There are multiple camera types to choose from. To change your perspective, press the [F12] key to cycle through the options. This only affects the movement controls and how the camera affects the character.
- Forward movement is based on the direction character is facing.
- Free view: camera can be rotated without turning character
- Back view: rotating camera will also turn character
| Perspective | Controls |
|---|---|
| 3rd PFV (mouse) | 3rd person free view
|
| 1st PV (keyboard) | 1st person view
|
| 3rd PBV (keyboard) | 3rd person back view
|
| 3rd PFV (keyboard) | 3rd person free view
|
A list of keys and the functions they're bound to can be found in the Hotkeys tab of the Options panel ([ESC]). You can customize the default key bindings to suit your playstyle. When changing a keybind, the updated field will appear blank but the new key should still be saved.
Combat
Targeting
Targeting another player, an NPC (non-player character), or a monster will display some information at the top of your screen. In the case of monsters, you will see their name, level, health bar, and a hint about their challenge compared to your level. Press [Q] to swap between Offensive Mode (auto-attacks) and Peace Mode (no auto-attacks).
| Control | Targets |
|---|---|
| Left mouse click | players, NPCs, monsters, or yourself |
| F-keys | nearby in relation to direction that your character is facing:
|
Skills
At the bottom of your screen, you will find your health points (HP), mana points (MP), stamina points (SP), and skill bar. As you unlock class skills, you can place them on your skill bar to buff your allies or use against enemies in battle. Click an unlocked skill in the skill window, then place it in a slot on the skill bar. You can use the skills on your bar by pressing the keyboard keys their slot is bound to ([1] - [8]). After using a skill, its icon will display a cooldown bar until you can use it again.

When you add a skill to your bar, you can hover your mouse over it to see the skill's tooltip information. The tooltip will show what resources the skill requires, its effect(s), and who it can target.
Looting
After defeating an enemy, make sure to loot them for any money or items. This can be done by pressing [V] while near their corpse to open the loot window.
Death and Revive
Your character is going to die - unfortunately it's unavoidable and the nature of many games. You can either revive yourself or have a Cleric cast Revive on you. When you are revived, you will lose some experience - the experience lost is greater at higher levels.
| To revive via... | How | Costs | Spawns you |
|---|---|---|---|
| Yourself | Enter /revive in chat | the most experience loss | at your last bindstone |
| Cleric | Use /shout in chat to ask for a revive | the lowest experience loss, depending on the Cleric's Revive level | where you died |
| Scroll | Purchased from the Fame shop | 50% or 90% reduced experience lost | at your last bindstone |
Help
Help Guide
There is a guide in-game that can be opened by pressing [F11]. The guide content is from the original games, so it may not be completely accurate, but it is generally helpful.
Shout
At level 5 you'll be able to use /shout in chat. This will send a message for anyone on the server to see. It can be useful for asking a high level cleric for buffs, getting a Revive to retain more XP after drying, or just asking for help on a quest. After sending a Shout, there is a 40 second delay before you can send another.
Discord
Everyone is very helpful. Ask in the Discord if you have any other questions!
Into Idios
Maps
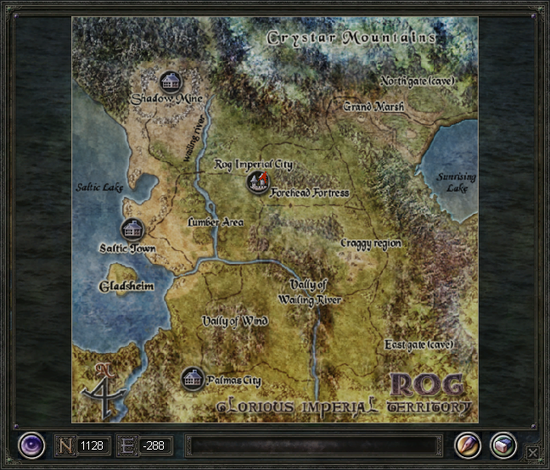
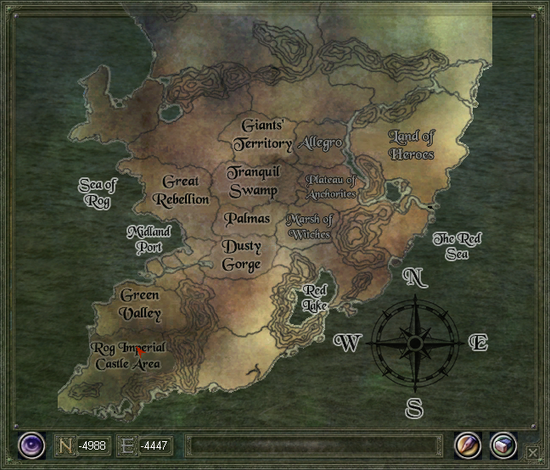
The original game, Ferentus, had a different map than what we have now in FHX. The original map is commonly referred to as "V1", while the primary map of Idios is "V3".
- Idios (V3) is the primary world map where the starting city and the progression quests are all located.
- Glorious Imperial Territory (V1) is the world map from the original game. During FHX Restoration, both world maps were made available and linked through a portal in the starting cities.
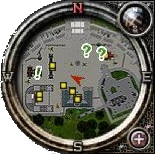
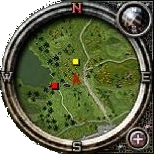
The mini map in the top right can aid in navigating these worlds. As you explore, you will see markers on your mini map. Hovering your mouse over the marker will display a tooltip for what it represents.
 NPCs like the Bank, Blacksmith, and Shops
- File:Minimap-bindstone.gif Bindstones
 Portals link to another specific portal somewhere else in the world.
 /
/ Quests
You can open the world map by clicking on the button attached to the top right of the mini map. Custom markers can be placed on the world map by giving it a label and saving the coordinates.
Exploring
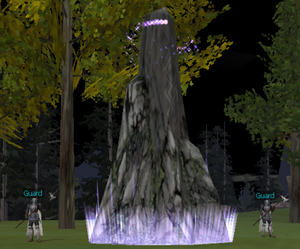
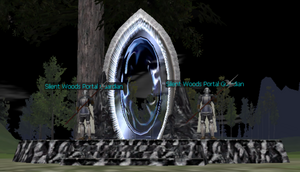
You're encouraged to explore! Every area is full of monsters to fight, people to discover, and scenes to behold, and you'll earn experience points as you defeat enemies. Set out on an adventure and see what you find!
Questing
There are numerous quests to discover and complete. It is highly encouraged to always be in a party during your adventures, even if playing solo, as some quests are only visible while in a party.
- Group quests are denoted by [Group] in their title and are only visible while in a party.
- Class quests are denoted by [Class] in their title and are only visible to characters of that class. The first quest in the class chain can be found at level 10? from NPC?.
Travel
As you continue your adventure, you will likely find a need to improve your ability to get from place to place. This can be done through a variety of ways.
- Bindstones can be bound to in case you need to revive your character. This is done by entering /bind while standing near a stone. Scrolls can also be used to teleport to your bindstone.
- Portals can be found in various areas, allowing quick passage to their linked counterpart.
- Scrolls can be purchased from a Grocer in any major city or a Mobile Shop out in the world. They have varying costs and can be used to teleport you to their listed location.
- Teleport is a spell that the caster classes can learn (Wizard, Summoner, Cleric). Wizards can memorize locations throughout the world and teleport directly there. Summoners have this ability as well through one of their summoned guardians. Clerics can use Visit to teleport to their party members, as well as Invite and Party Recall to teleport others to them.
Leveling up
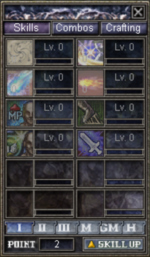
As your character gains experience, they will level up and gain skill points and attribute points to spend. It's recommended to save attribute points so you can spend them to meet the requirements on weapons and armor. Additionally, as your skills are used they too will gain experience and level up. This means that skills get stronger the more you use them. See Skills for more information.
All skills are either Passive or Active. Passive skills simply need to be unlocked to be in effect - and will gain experience as those passive effects are utilized. Active skills require activation to be used.
- Class skills include skills like passive increases to armor defense, self-buff spells, curses, weapon attacks, and ranged magic attacks.
- The point cost to unlock each class skill increases based on their tier (page). Tier I skills cost 1 point, tier II costs 2 points, tier III costs 3 points, and master (tier IV) costs 4 points.
- Crafting skills include the skills needed for manufacturing and upgrading items.
Warning:
Equipment
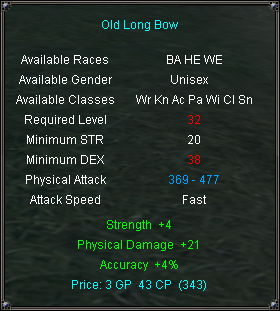
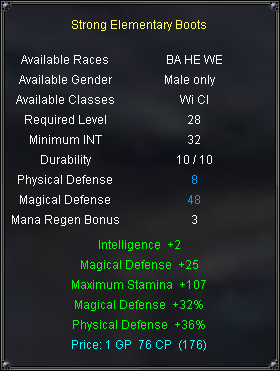
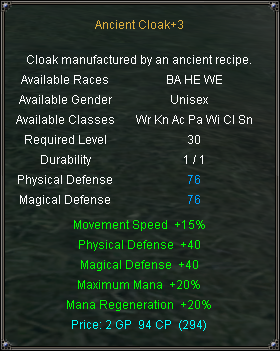
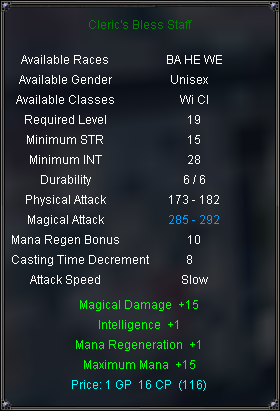
Some shops sell normal items, but more powerful equipment can be found by completing quests and looting monsters. Equipment with a colored name contains item bonuses associated with its rarity (grade). Normal items are white and contain no bonuses, magic items have 1-3 bonuses, rare have 3-5, and soul items have 4-5 (most having 5). Unique items are only found as quest rewards and can have 1-4 bonuses.
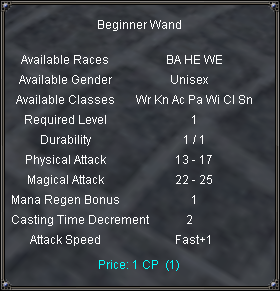
Each equipment item has requirements, shown in the tooltip, that must be met in order to equip it. These requirements can include minimum level, minimum attributes, specific class(es), or specific gender.
You can have up to 2 weapon sets at a time. To swap weapon sets, press [E]. This is useful for characters that want to alternate between active item bonuses, attack speed and damage, or defense.
Advanced Combat
Party
Parties can also level up as its members gain experience. Higher level parties reward more experience and better loot to its members. Open the party bar by pressing [P] to join a party or create your own.
Target-of-target
To share an ally's target or quickly select target-of-target, you can use Right mouse click on a party member in the party list. This is used to help focus damage on the same target as someone else.
Skills (continued)
As you unlock more skills, you may find that you can't put all necessary skills on one skill bar. There are 8 skill bars you can fill, accessed by clicking the up/down arrows to the right of the skill bar or by using [ALT+1] - [ALT+8].
Additionally, you will also gain access to skill combos. These are found on the Combos tab of the Skill window. Hovering your mouse over a combo will display a tooltip with what skills are part of the combo, and which are unlocked. Skills and combos are also listed in the individual Class articles.
To activate a skill combo, activate the first skill in the combo list. As the skill is cast, an additional casting bar will appear on screen - press [L-Shift] at the right moment to continue the combo chain. The combo casting bar appears sequentially for each additional skill in the chain.
Pets
Pets are NPCs that the player has limited control over. Mercenaries can be hired for a fee, while Summoners can summon guardians to aid them in battle. The pet bar can be opened with [L] and pet skills are activated with the [F1] - [F5] keys.

Inventory
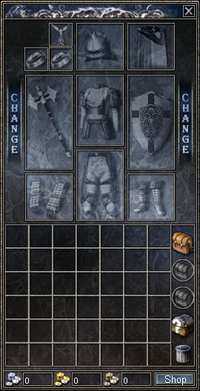
Open your inventory by pressing [I]. You'll always have one bag equipped, and can acquire more from shops, quest rewards, or as monster loot.
- Save normal (white) rings and necklaces as they can be upgraded later and can be worn by any character.
- Low level normal items can be sold to shops for extra coin.
- Magic, Rare, and Enchanting sheets can be sold in player shops for a decent price.
Bags come in different sizes, the largest being a 7x6 trunk. You can equip up to 2 additional bags in your inventory to expand your storage space. Every major city has a Bank where you can deposit items so you don't have to keep your inventory full. Bank space is shared between all characters on an account.
Trading
You can trade with another player by targeting them and entering /trade in chat. Trade can be temporarily disabled by entering \trade off - trade can interrupt actions, so some players prefer to turn it off for solo play and especially in PVP so it can't be used maliciously.
Player shops
Player shops are very popular in the starting city. If you see characters sitting around with notices above their heads, those are player shops. Click on a player to view their shop and items for sale. You can create your own by clicking Shop in your inventory, dragging items into the window, and setting your desired sell price. Player shops persist when you're offline, so you can passively sell items without being in the game.
Community
Joining a guild
One of the best ways to enjoy the game with friends is by joining a guild. You can use /shout in game or post in the #guild-recruitment channel on Discord to look for a recruiting guild. Creating your own guild requires a full party of 8 members, at level 30+, and costs 10 ![]() 0
0 ![]() 0
0 ![]() .
.
Level 30 and beyond
There are currently enough quests from the original games to reliably level up to 30 from questing alone. After that, progression quests become more scattered. There are a few methods for gaining experience beyond level 30. The current maximum character level is 65.
Daily Quests
Once you reach level 30, you will be able to accept daily quests from the Rog Guard Commander located in Rog. These quests will take you all over the V1 and V3 maps to hunt down numerous monsters for substantial experience rewards. New quests are available at 12:00 AM (UTC) every day, as long as you don't already have one in your quest log.
Arenas
Arenas are available at level 25, but generally aren't used for leveling until 30+ since questing is faster. Below is a summary of the available arenas and their objectives. Each stage is a timed challenge and completing each stage grants bonus experience. You need a minimum of 3 members per party to start the arena, and each member must be within the permitted level range.
| Location | Level range | Objective |
|---|---|---|
| Midland | 20-25 | PVP, 2 parties, and defeat number of enemies |
| Palmas | 30-35 | PVE, 1 party, and defeat number of enemies |
| Tranquil Swamp | 40-45 | PVP, 2 parties, and defeat number of enemies |
| Gypsy Town | 50-55 | PVE, 1 party, and defeat number of enemies |
Bosses
There are several bosses that can be hunted for high grade equipment. These monsters usually require some strategy and multiple characters to battle. Some bosses have server announcements that you might see periodically as they spawn. Those announcements are also posted in the #boss-timer channel on Discord. See Bosses for a more expanded list of bosses throughout the game.
| Image | Name | Level | Location | Difficulty |
|---|---|---|---|---|
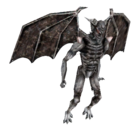 |
La Borc Majong | 58 | Lvl 1-49 PVP | Intermediate
|
 |
Cult Priest | 65 | 50+ PVP | Easy
|
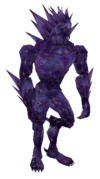 |
Obsidian Golem | 80 | V1 | Intermediate |
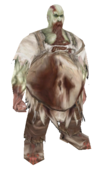 |
Elder Ghoul | 80 | V1 | Challenging |
Multi-client
Due to the limited player population and varying time zones, it is common practice to create multiple accounts and use multi-clients to control multiple characters. When setting up multiple accounts, if you have a Gmail address, you can branch your email address without needing to create numerous email accounts. This is done by adding "+" between your email and @ in the address.
Example: myemail@gmail.com -> myemail+fhx001@gmail.com

