Help:Images/Image transparency: Difference between revisions
m (→Transparency) |
m (→Transparency) |
||
| (2 intermediate revisions by the same user not shown) | |||
| Line 1: | Line 1: | ||
[[File:boss-labark.png|200px|thumb|An image with transparency applied]] | [[File:boss-labark.png|200px|thumb|An image with transparency applied]] | ||
For some images it is worthwhile to add transparency to further enhance an article. This is especially important when taking screenshots from the [[Editor]] - allowing you to delete the black background to make the subject clearer. Transparency may be applied before an image is uploaded or once it is already on the wiki. Previously uploaded images that editors need to add transparency to can be found in [[:Category:Images needing transparency]]. | For some images it is worthwhile to add ```transparency``` to further enhance an article. This is especially important when taking screenshots from the [[FHX Editor]] - allowing you to delete the black background to make the subject clearer. Transparency may be applied before an image is uploaded or once it is already on the wiki. Previously uploaded images that editors need to add transparency to can be found in [[:Category:Images needing transparency]]. | ||
This guide will cover how to apply transparency using [https://en.m.wikipedia.org/wiki/GIMP GIMP] [http://www.gimp.org/] - a free and open-source image editor. | This guide will cover how to apply transparency using [https://en.m.wikipedia.org/wiki/GIMP GIMP] [http://www.gimp.org/] - a free and open-source image editor. | ||
| Line 14: | Line 14: | ||
| 3. || '''Select''' the background. || Click Fuzzy Select Tool (top left) > click the black background. || [[File:Wiki Help Image transparency - select background.png|150px|thumb|Background selection]] | | 3. || '''Select''' the background. || Click Fuzzy Select Tool (top left) > click the black background. || [[File:Wiki Help Image transparency - select background.png|150px|thumb|Background selection]] | ||
|- | |- | ||
| 4. || '''Delete''' the selection. || Press {{key|Delete}}. If there are any background areas contained within the image, like around arms or hair, those can also be selected and deleted. | | 4. || '''Delete''' the selection. || Press {{key|Delete}}. If there are any background areas contained within the image, like around arms or hair, those can also be selected and deleted.<br><br>{{page info|message=This should result in a checkered background. If the background is now white, Undo the delete and make sure to add the Alpha Channel.}} || [[File:Wiki Help Image transparency - delete background.png|150px|thumb|Successfully removing the background]] | ||
{{page info|message=This should result in a checkered background. If the background is now white, Undo the delete and make sure to add the Alpha Channel.}} || [[File:Wiki Help Image transparency - delete background.png|150px|thumb|Successfully removing the background]] | |||
|- | |- | ||
| 5. || '''Crop''' the image. || Click Image (top) > Crop to Content || [[File:Wiki Help Image transparency - crop to content.png|150px|thumb|Before cropping]] | | 5. || '''Crop''' the image. || Click Image (top) > Crop to Content || [[File:Wiki Help Image transparency - crop to content.png|150px|thumb|Before cropping]] | ||
[[File:Wiki Help Image transparency - cropped.png|150px|thumb|After cropping]] | [[File:Wiki Help Image transparency - cropped.png|150px|thumb|After cropping]] | ||
|- | |- | ||
| 6. || '''Export''' the image as '''.png'''. || Click File (top left) > Overwrite if already a .png or Export to save it as a .png. || [[File:Wiki Help Image transparency - save.png|150px|thumb|Overwrite .png]] | | 6. || '''Export''' the image as '''.png'''. || Click File (top left) > Overwrite if already a .png or Export to save it as a .png.<br><br>{{page info|message=If the transparency isn't being saved properly, click Image (top) > Mode > RGB and export again.}} || [[File:Wiki Help Image transparency - save.png|150px|thumb|Overwrite .png]] | ||
|- | |- | ||
| 7. || colspan=3 | The image is ready to '''[[Help:Images#Step 3: Uploading the image|upload]]'''! | | 7. || colspan=3 | The image is ready to '''[[Help:Images#Step 3: Uploading the image|upload]]'''! | ||
Latest revision as of 15:35, 23 June 2024
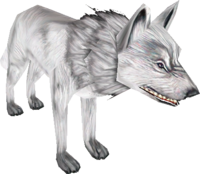
For some images it is worthwhile to add ```transparency``` to further enhance an article. This is especially important when taking screenshots from the FHX Editor - allowing you to delete the black background to make the subject clearer. Transparency may be applied before an image is uploaded or once it is already on the wiki. Previously uploaded images that editors need to add transparency to can be found in Category:Images needing transparency.
This guide will cover how to apply transparency using GIMP [1] - a free and open-source image editor.
Info:
Transparency
| 1. | Open your image in GIMP. | ||
| 2. | Add Alpha Channel to the image layer. | Click Layer (top) > Transparency > Add Alpha Channel | 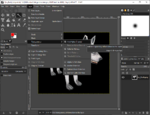 |
| 3. | Select the background. | Click Fuzzy Select Tool (top left) > click the black background. | 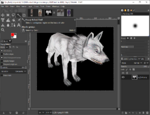 |
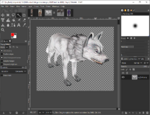
| 4. | Delete the selection. | Press Delete. If there are any background areas contained within the image, like around arms or hair, those can also be selected and deleted. Info:
|
 |
| 5. | Crop the image. | Click Image (top) > Crop to Content | 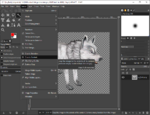 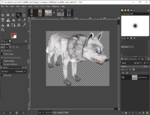 |
| 6. | Export the image as .png. | Click File (top left) > Overwrite if already a .png or Export to save it as a .png. Info:
|
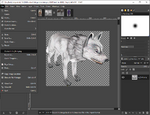 |
| 7. | The image is ready to upload! | ||
| How to help |
|---|
|
